Why it is necessary to convert photos into other formats
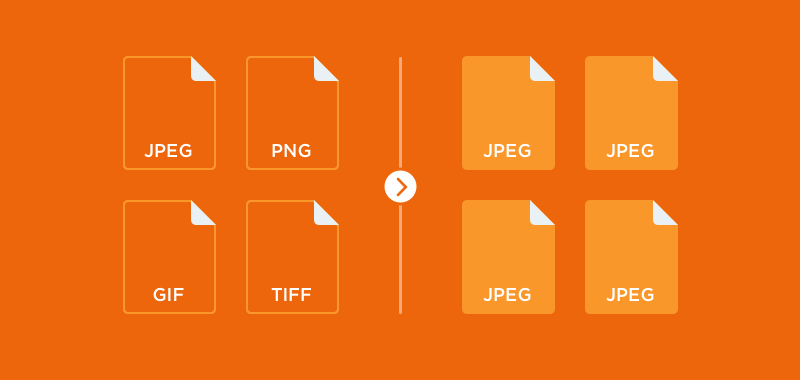
According to the Google statistics, the question "How to convert photo" is made about more than a thousand times per month. Of course, there are a lot of variations of this query, as you can guess: how to convert JPG to PNG, how to convert TIFF to JPEG and so on. Nowadays, as you know, there are a huge number of formats for storing photos. However, until the more recent time, the most commonly used image formats all over the World Wide Web were considered to be GIF or also known as Graphics Interchange Format and JPEG or also known as Joint Photographic Experts Group. But now, these top two leaders have one more member, relatively new image format - PNG or also known as Portable Network Graphics. Each format has something unique and is usually marked by the letter extension of the file name assigned to it, for instance, .gif, .png, .jpg, .tiff, etc.

By the way, under the term file format is implied, first of all, its structure. The latest determines the way of storing the information contained in it. Do not confuse the concept of "format" and "extension" of the file. The extension reflects the part of the file name only, that is separated from the main name by the dot sign. The file extension allows us to determine what kind of information is stored in it, for example, text, music, image, etc. Extension is inseparable from the file and changing it can lead to data loss. For example, if you decide to change the format of a photo, namely convert to GIF by changing file extension manually, well, it does not work this way, as you need to use a specialized Mac image converter solutions. In other words, how and where you need to use pictures will influence the decision of conversion, to convert PNG to JPEG, JPG to PNG, or probably there is a necessity to convert TIFF to JPG. Do not think that the question of conversion can bother professionals only, as in reality, even a newbie can face the issue of photo conversion.
Let’s have a closer look at the 5 most popular image formats
- JPEG is the most popular format for storing raster images such as drawings, photographs, etc. This format assumes a high compression ratio of the contained information, that in its turn provides a relatively small size of JPEG files. In order to place photos on the Internet or to send via email, it is advisable to change the format of the photo to JPEG. This is an economical and convenient format for storing raster information that supports 16.7 million colors.
- BMP is the standard format of graphic files for Windows. As a rule, the BMP format has all the drawings made in the Paint editor, or, for example, the standard desktop wallpapers. Photos in BMP format are stored uncompressed and can take up a lot of the disk space. That is why, it is often required to convert BMP to JPG format or a more ergonomic one (TIF, GIF, etc.).
- TIFF or TIF is another popular raster graphic format, which allows you to compress images without losing quality. This format supports 16.7 million colors, is considered the standard format for data exchange between computers. It is popular among professionals, for example, users of digital cameras.
- GIF is literally translated as "the format of the exchange of graphic data". Files stored in GIF format have a small size and can consist of several "frames", which allows you to create rather simple animations. The main disadvantage of GIF is the limited color set of this format. Therefore, for storing multi-color images, it is advisable to convert GIF to JPG or TIFF.
- PNG format is designed for both improving and replacing the GIF format with a graphical format that does not require a license for use. Unlike GIF, PNG has a support for an alpha channel and the ability to store an unlimited number of colors. Unfortunately, not all browsers can correctly process alpha transparency.

With such a variety of formats, it's easy to get confused and store your images in a non-optimal way. Wondering what can go wrong? The answer is simple, for example, by using "lossy compression" you can lose image quality, in addition, unprocessed, raw images can take up a lot of disk space. Also, each of the above formats has its own drawbacks and advantages, for example, the image quality of the PNG format is higher than in the GIF format but, unfortunately, some versions of Web-browsers do not support PNG format. Maybe you have faced the issue with the error message “Unacceptable file format”. If yes, then you probably the reason for that was the format of the uploading image.
Even more significant the problem of image conversion is for webmasters. How to make the images look beautiful on the site but at the same time they would not take up much space and would download quickly? Nevertheless, choosing an image format is a task that must be solved before you upload it to the Internet. Which of these formats should be chosen?
Main factors when choosing the format to convert images
- First of all, it is necessary to start from the specific practical considerations: where the image will be used, whether it is supposed to be printed, etc.
- The chosen format should be fairly common so that programs (for example, graphic editors) could read it.
- Another important criterion is the possibility of compressing the photo. For example, for placing on a site or sending an image by email, using the BMP format will be an absolutely unreasonable solution. It is much more convenient to change the format of the photo and convert it to JPEG or GIF.
In addition, you should also consider the following factors when you choose the format of the photo, including:
- If you want to get the highest speed for loading and sending, there can arise the necessity to compress the image thus sacrificing its quality.
- If you are bounded by the free space for keeping your photos, there can arise the necessity to minimize the size of the photo.
- If you need to send photos more than a few times there can arise the necessity to increase transmission speed.
Definitely, there is a bunch of other reasons. Nevertheless, they all lead to the following ones, namely “How to convert?” and “What is the best image converter for Mac?”. If you go to the Internet and start your search, you could find innumerous results. The most common variants of these solutions are PNG to JPG converter as well as JPG to PNG converter. However, there are also such solutions that offer a wider range of output formats. So, in case, if you are dealing with different formats you should not worry about finding a decent converter to fully satisfy your requirements as the market is full of them.
As you know, editing a large number of images can take quite a long time. Even more, this process is rather tiring and can easily deprive you of a significant amount of inspiration and energy. That is why batch processing of images is a real bliss that allows you to change the format of photos, as well as edit a large number of photos at a time in a very easy and convenient way. In other words, the ability to work with a group of images is a huge plus, especially if you need to make the same type of editing for a hundred or a thousand of photos.

PhotoBulk — a flawless solution to convert multiple photos
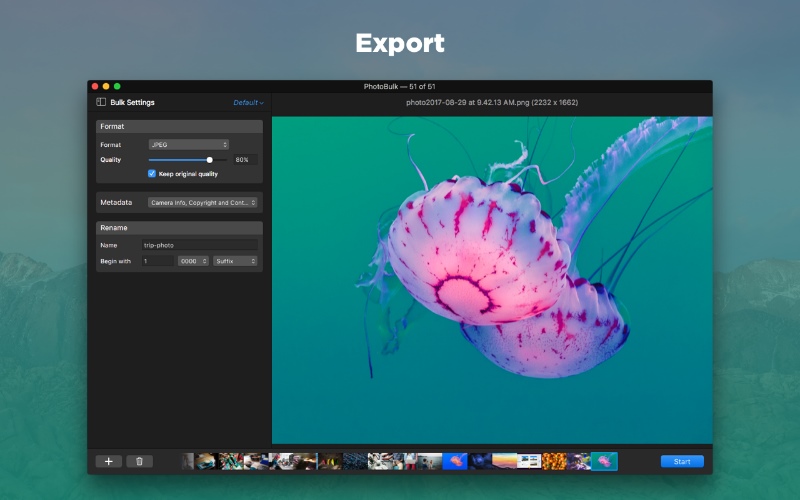
PhotoBulk is exactly such kind of app that allows you to edit photos in bulk and is a great image converter for Mac. The app is developed by Eltima Software and has a sleek and rather minimalistic interface. PhotoBulk offers a set of really useful features that can make the mundane work easier. When using this app such questions like “How to convert PNG to JPG?” or to other formats will fade away, because with just a couple of clicks and within a couple of minutes you will have all the images converted to the necessary format. PhotoBulk supports the following input formats as JPG, PNG, GIF, BMP, TIFF and HEIC format, while the output formats are JPG, PNG, GIF, BMP, and TIFF.
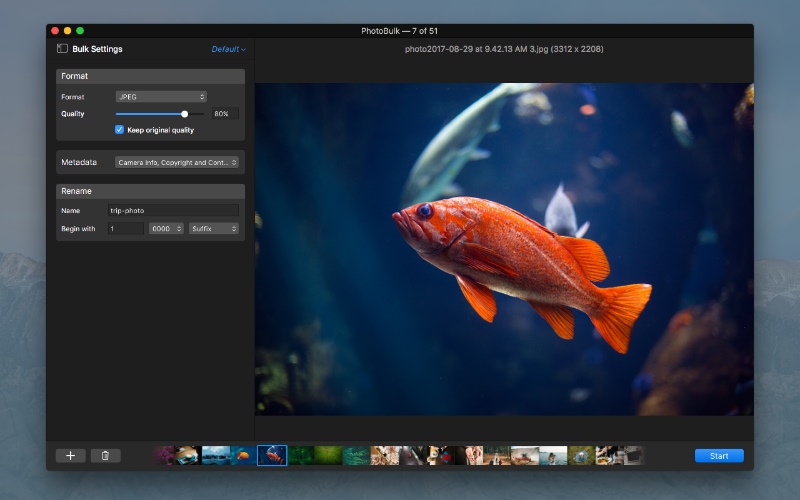
Another thing, that should be pointed out is the option to choose the quality for the output images in JPG format. You just simply need to drag the slider to the left or to the right. Besides that, the app offers “Keep original quality” option that can also be rather useful. As it was already mentioned above you don’t need to be a genius to understand how the app works, just read below the detailed information and see how easy it can be.
Step-by-step guide how to convert images with PhotoBulk
- The first thing that is required to do is of course to download the app from the Mac App Store.
- After the download is completed, you need to install the app on your computer.
- Launch the app and choose the photos you want to convert into the corresponding format.
- Move them to the PhotoBulk’s editing window. You can do it in several ways, namely:
• drag and drop the photos/folders to the editing window;
• drag and drop the photos/folders to the application icon in the Dock;
• choose File → Open… from the menu bar;
• use the following shortcut ⌘O;
• click the + character button.
Choose the way you like the most or use several of them according to your wishes. - All the added photos are displayed at the bottom of the Preview window in the form of a filmstrip. You can seamlessly delete any of the mistakenly added photo or several of them:
- If you want to edit photos before converting them, apply all the necessary settings according to the requirements.
- Once everything is ready and you are to convert the photos, check the Format option in the sidebar that will add the corresponding field.
- From the drop-down list you can select one of the five available output formats, namely:
• JPG;
• PNG;
• GIF;
• BMP;
• TIFF. - If you have done with all the settings, click the “Start” button at the right bottom.
- Choose the path for your proceeded photos to be saved.
- Hit the “Save” button.

• by right-clicking it and choosing Delete from Gallery from the contextual menu;
• choose File → Delete Selected Image from Gallery;
• Use the following shortcut ⌘⌫.
Also, it should be mentioned that the app offers such a great feature as saving the settings to Presets that can minimize your efforts in the future. So, as you see, PhotoBulk is not only PNG to JPG converter or vice versa but also a rather useful app that allows you to resize, optimize and rename photos in bulk, add one or more watermarks. Besides the written above, the current version of PhotoBulk offers Metadata settings option that allows you to choose metadata to include in output images.
Give this Mac image converter a try and be sure that you will forget about spending long hours in front of the computer searching for the user-friendly and powerful image editing tool.
PhotoBulk
Version 2.7.344 (7 Apr, 2025) Release notes
Category: Utilities